This guide was created by and for ultralight pilots, but it is also a helpful reminder for all pilots to fly safer. In addition, it is important that you understand the specific rules and regulations related to the airspace you’re flying in, your licence and its limitations, your aircraft, and your abilities.
Let’s all do our part to improve the safety culture in our community by applying these best practices. We hope that you will find the recommendations in this guide useful and make your upcoming flights safer.
Is your aircraft safe to fly? Is it in good condition and does it perform as expected? These are some of the questions you should ask yourself, especially if you have just acquired an ultralight (used or new) or some maintenance has been performed on your aircraft.
The test flight is an important step you should take to ensure your aircraft is fit and safe to fly. Remember that your life and your aircraft integrity may depend on this important step.
On this page
- The test flight
- Planning your test flight
- Select an airport
- The test pilot
- Check that your aircraft is airworthy
- Weight and balance
- Power plant test
- Inspect the propeller
- Low-speed taxi test
- High-speed taxi test
- First flight
- Complete a pre-flight inspection
- Develop in-flight emergency procedures
- Wait for calm weather
- Communicate
- Rejected takeoff criteria
- Safe climb
- Determine handling characteristics
- Maintain communications
- Determine landing characteristics
- Determine low-speed handling
- Practice approaches
- Communicate your landing intentions
- Complete the landing checklist
- Final approach
- Go-around decision
- Touchdown location
- Debrief
- Contact
- Related links
The test flight
This guide was created by and for ultralight pilots, but it is also a helpful reminder for all pilots to fly safer. In addition, it is important that you understand the specific rules and regulations related to the airspace you’re flying in, as well as the limitations of your licence, your plane, and your abilities.
Let’s all do our part to improve the safety culture in our community by applying these best practices. You may have spent hours building and overhauling your ultralight, or maybe you’ve just acquired a new one. Regardless, it is time for the next phase: the test flight to make sure your aircraft is fit for flight and performs as it should.
Planning your test flight
The goal of a test flight is to check an aircraft’s controllability in different manoeuvres and flight conditions and to look for any hazardous operating characteristics. The collected data will help you tailor the flight manual to your aircraft’s performance.
The following are some key considerations and criteria for your test flight:
Select an airport
The runways should be the right length, width, and orientation for your plane. There should be emergency fields within gliding distance and a nearby place with communications (such as a universal communications [UNICOM] station or a tower). If there’s no UNICOM or tower near the aerodrome, advise a responsible person of your plans and give them detailed contact information for you and first responders. Access to emergency and support services from your local fixed-base operator (FBO), club, or association is important as well.
The test pilot
The test pilot should be fit (a test flight is stressful and strenuous—the IMSAFE checklist will help you assess your fitness), alert, rated, current, and competent for the category and class of aircraft being tested. The pilot should be familiar with the local area and should have flying experience in aircraft similar to the one being tested. The pilot should be current on the type of plane he or she will be flying (if it is a tail-wheel type, for example), and review the planned manoeuvres, cockpit layout, and emergency procedures.
Pilots flying basic ultralights must wear a helmet, and it is strongly encouraged for others. Test pilots should also use other safety equipment like a flight suit.
Check that your aircraft is airworthy
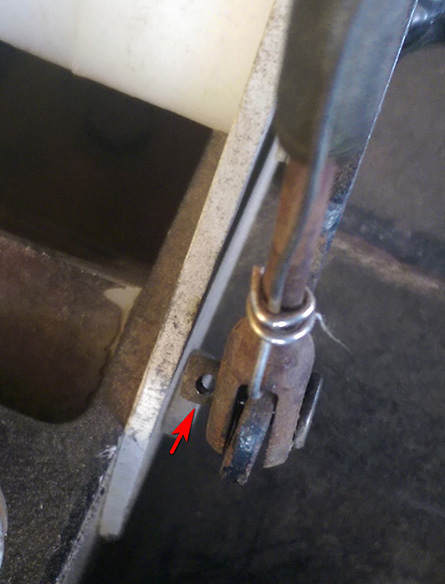
Use the post-assembly checklist from your aircraft’s manufacturer. This usually includes the inspection of the:
- control stick
- rudder pedals
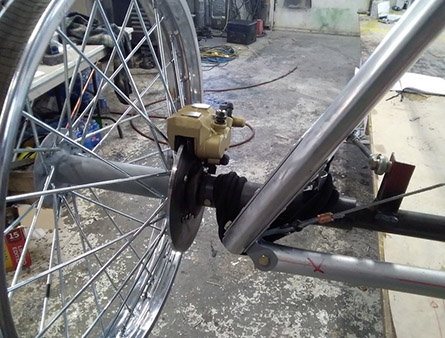
- brakes
- landing gear
- control surfaces
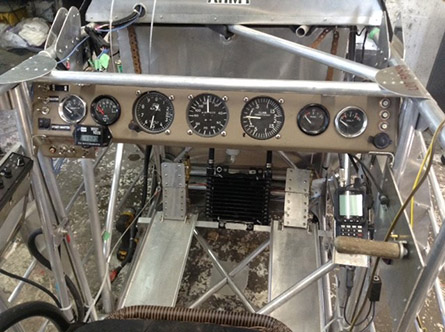
- instrument panel
- engine
- fuel system (clean, flushed, and calibrated with no leaks)
- static systems
- safety belts and harness
- avionics and electrical system (check for connections)
- cowl
- panels and door latches
Weight and balance
Check that the aircraft’s weight and balance is correct. Understand the importance of the centre-of-gravity location and how it will affect handling, and adjust if needed. Watch the Ultralight Pilot's Association of Canada's weight and balance video for more information on this topic.
Power plant test
The objective of this test is to make sure that the engine has been correctly run-in and is safe to operate in all revolutions per minute (RPM) ranges. Engine instruments (RPM, cylinder head temperature [CHT], exhaust gas temperature [EGT], oil temperature and pressure, coolant temperature, etc.) should all read accurately. Idle speed, carb heat, and fuel flow should all be working correctly. Check the reduction drive belt’s tension. Record or review run-in test data.
Inspect the propeller
Inspect for serviceability and correct torque in accordance with the manufacturer’s instructions. For a wooden propeller this is usually done after first hour and every 10 hours after that. If the aircraft has been in storage for 3-6 months, make sure to check the mounting bolt torque. Check propeller tracking, too. Each blade should be within the manufacturer’s specification.
Low-speed taxi test
At least one other person should monitor taxi tests. Advise air traffic control (ATC) and other aircraft of your intentions to perform a taxi test. Watch for no radio (NORDO) and other air or ground traffic that is not on the radio frequency.
Monitor engine instruments while you perform 90, 180, and 360-degree turns and braking. Check for fluid leaks after each test.
During the low-speed taxi test, the pilot should pay attention and get a feel for control sensitivity. Avoid over-controlling the airplane on the ground (tail-wheel aircraft are subject to ground loop).
High-speed taxi test
Plan this activity as if it were a flight.
Communicate your intentions.
Before conducting a high-speed taxi test, perform a full-power ground run for at least 3 minutes to check the fuel flow, EGT, RPM, CHT, oil temperature and pressure with the aircraft set to a climb attitude.
Once in a while, a high-speed taxi test will lead to an inadvertent first flight. Be ready to fly even if it is not your intention.
Increase taxi speed by increments of 5 miles per hour (mph) until you’re within 80% of the aircraft’s predicted stall speed.
Test aileron effectiveness with a gentle wing rock.
- In a nose-wheel airplane: If the nose can’t be raised at this speed, check your weight and balance again.
- In a tail-wheel airplane: You should be able to lift the tail. If you can’t, check the centre of gravity again.
Perform the test again with flaps, if equipped. Estimate your lift-off point and mark this location. This will give you a reference point for your first flight.
Determine the braking distance at 80% of the lift-off speed, then reduce to idle and apply brakes once that speed has been reached. Add 30% to this distance, then place an abort marker at this spot. The first high-speed taxi test should be done in light-wind conditions.
First flight
Your test-flight plan should call for no more than 1 hour of actual flight time. This will reduce pilot fatigue and the likelihood of an engine failure or airframe malfunction due to vibration or construction errors. Your test-flight plan should include any manufacturer’s guidance from the build manual.
Determine how you’ll collect data. It is difficult to fly a hands-on aircraft while recording flight data. Consider having a ground support person and giving him or her flight-data details by radio. You could also use a device that automatically records the information without distracting you from flying the aircraft.
Complete a pre-flight inspection
Before the first flight, the test pilot and at least one other experienced person should do a thorough pre-flight inspection. This other person can also help you collect data during the flight but must have access to communications to monitor the flight.
Develop in-flight emergency procedures
Develop a complete set of in-flight emergency procedures to help you manage difficult situations. Emergency procedures could include:
- engine failure on takeoff
- engine vibration with increasing RPM
- smoke in the cockpit
- cabin door opening in-flight
- misaligned control surfaces
- engine/fuel shut-off
Wait for calm weather
Your first flight should only be done in calm conditions to remove the weather variable as much as possible.
Communicate
You should advise the tower/UNICOM and broadcast after you have completely checked each aircraft system. Transmit the aircraft registration beginning with C- (tail number), location, and intentions every 10 minutes.
Rejected takeoff criteria
Abort takeoff if your oil pressure or tachometer reads low. If there are any unusual vibrations or if the engine achieves its limits, abort the takeoff. Takeoff should be gentle. Abort takeoff if you experience unusual stick forces. Expect the torque effect depending on the aircraft’s design.
- To abort takeoff in a tail-wheel aircraft: Keep the tail wheel on the ground until the rudder is effective. This usually happens at 35 mph.
Safe climb
Establish a safe climb. Don’t make any large control inputs into the flight controls for the first 1 000 feet (ft) above ground level (AGL). Climb to a safe altitude and level off.
Determine handling characteristics
Due to the slow cruise speed and low weight of ultralights, their flight controls can feel “light” or “sensitive”. Once you’ve made your flight control input, the response rate tends to be slower than the one for an input on a faster and heavier aircraft. The thrust and drag line coupling of many ultralights are often more pronounced. Expect a pitching reaction when applying or reducing power. Control inputs should be gentle:
- Yaw the nose left and right 5° and note how the plane responds.
- Pitch the nose 3° up and down and note how the plane responds.
- Try gentle banks of no more than 5°.
- If the plane is stable and flying smoothly, complete a 360° turn left and right with a bank angle no more than 10°.
Maintain communications
Keep the tower/UNICOM informed of what you are doing and your intentions.
Determine landing characteristics
Level off, fly a pretend landing pattern, and test the flaps. Ultralight aircraft are very lightweight. Quick power changes can take you from cruise speed to a stall in under 4 seconds. This is due to the low-mass, high-drag configuration, and the smaller speed-range characteristic of the ultra-light aircraft. When you are at a low cruise power setting and straight and level, watch how the aircraft trims out.
Determine low-speed handling
An approach to a stall check helps find the initial stall speed (vertical speed indicator [VSI]) in mph or knots (kt) so you can calculate the approach speed for landing. You will also know the aircraft’s handling characteristics at low speed. Due to their high angle of dihedral, most ultralight stalls tend to be in straight-forward flight, especially during a power-off stall. These ultralights experience little airframe buffeting. The only stall indications a pilot might recognize are the ultra-light’s slowed forward movement, a quick drop in altitude, and controls that are suddenly mushy and usually ineffective.
Practice approaches
You may choose to practise several approaches in altitude or low approaches to the active runway to get a solid understanding of lower airspeeds, aircraft attitude, and an overall feel of the aircraft in landing configuration (review your go-around procedure before flight).
Communicate your landing intentions
Before each low approach at the airport, advise the tower/UNICOM of your intentions. Avoid other traffic in the pattern and use the landing checklist.
Complete the landing checklist
Complete the landing checklist before entering downwind. Keep all turns at less than 20° of bank. Don’t cross-control by using the rudder to move the nose—this will increase the bank angle, which most pilots will correct by using opposite aileron. If this is allowed to continue and there is backpressure on the stick, it will result in a cross-control stall and a roll to a near vertical bank attitude at the beginning of a spin with no altitude left for recovery.
Final approach
On final approach, the aircraft speed should be between 1.3 and 1.4 times the recorded first flight pre-stall speed. Homebuilt biplanes (high-drag aircraft) should use an approach speed of 1.5 times the stall speed on landings. Landings, especially the first one in an amateur-built or kit plane, are always exciting. Proceed slowly and do not over-control.
Go-around decision
If the landing conditions are not ideal, be prepared to go around.
Touchdown location
The actual touchdown should happen in the first third of a runway, with brakes applied before the red flag (abort) marker.
Debrief
After taxiing in, secure the aircraft, debrief the flight with members of the team, review the data you’ve collected while it is fresh in your mind, and then perform a careful post-flight inspection of the aircraft together. The most common emergency in ultralight and amateur-built aircraft is engine failure.
When an engine fails, FLY THE ULTRA-LIGHT!
Push the nose down to maintain airspeed. Pick a landing field and try to land into the wind. If the pilot knows the cause of the engine failure and can easily fix it in-flight (such as failure to switch fuel tanks), he or she should do so if time and the situation permit.
Do not focus all of your attention on restarting the engine. If you do so, you could be distracted and accidentally let your airspeed bleed off and either stall or enter a spin.
The best way to be ready for an engine-out procedure is to practise and practise again until the real thing becomes a non-event.
Gord Dyck, Director of UPAC and member of the Ultralight Working Group, with the aid of the working group members, wrote this new Best Practices guide, the 4th developed by this Working Group.
Contact
If you have any comments, suggestions or want to be part of one of the General Aviation Safety Program Working Groups, you can contact us at TC.GeneralAviation-AviationGenerale.TC@tc.gc.ca.


