
On this page
- 1. Introduction
- 2. How to access CRS from TDG Online
- 3. Registering for CRS
- 4. The CRS registration form as a whole
1. Introduction
TDG Online is Transport Canada’s web portal for transporting dangerous goods.
This is the third of three initial user guides for TDG Online. Changes made to this user guide correspond to changes made to TDG Online in December 2024.
This third guide assumes that you’ve read TDG Online User Guide – Setting Up Your Accounts and TDG Online User Guide – Getting Around TDG Online. The guide continues from where module 2 left off. If you haven’t reviewed the previous user guides, please do so.
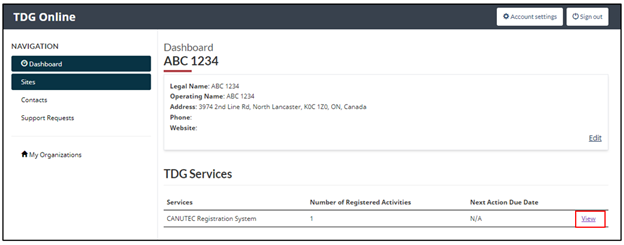
2. How to access CRS From TDG Online
- Start from the organization’s dashboard
- From the TDG Services section, select “View”
- If you have a registration, the details of your organization will be displayed
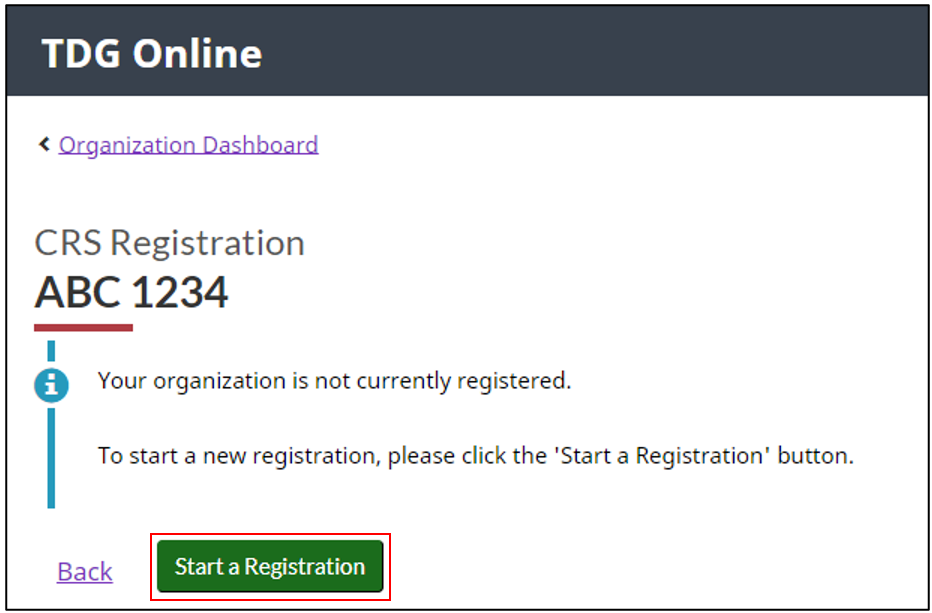
3. Registering for CRS
If you don’t already have a registration, you will be directed to start the registration process.
- Select on the “Start a Registration” button
3.1 Complete the organization details
- The CRS registration system is displayed
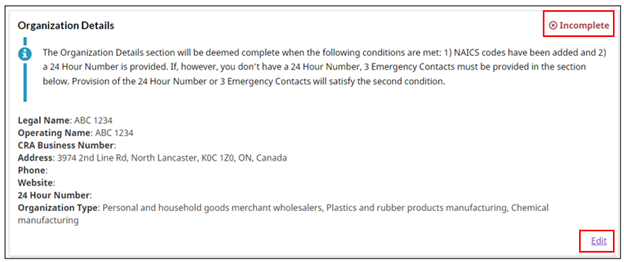
- The Summary menu item displays the organization details
- Note the status of the section
- If the status is “incomplete”, click on “Edit” and complete the section. If the status is “complete”, you can go to the next section of this guide
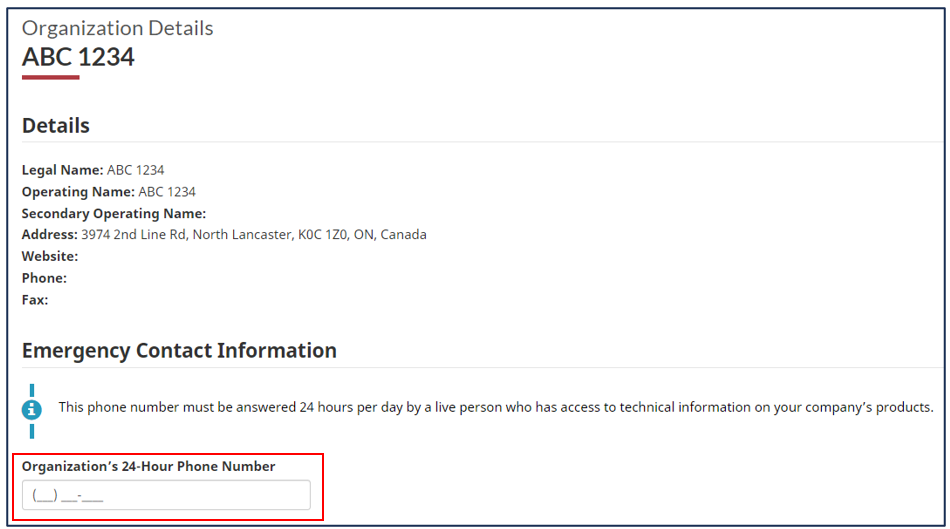
- Enter emergency contact and organization type
- The Organization Details section is complete when:
- a 24-Hour Number has been added or 3 Emergency Contacts are added to the Manage Emergency Contacts section below
- Important Note: The 24-hour number must be answered 24 hours a day by someone who has access to Safety Data Sheets. If you provide the organization’s 24-hour number, the next section, will be deemed complete
- NAICS codes have been added
- a 24-Hour Number has been added or 3 Emergency Contacts are added to the Manage Emergency Contacts section below
- Your organization’s 24-hour number is an optional field. If, however, you don’t provide it, you will be required to provide 3 emergency contacts in the next section.
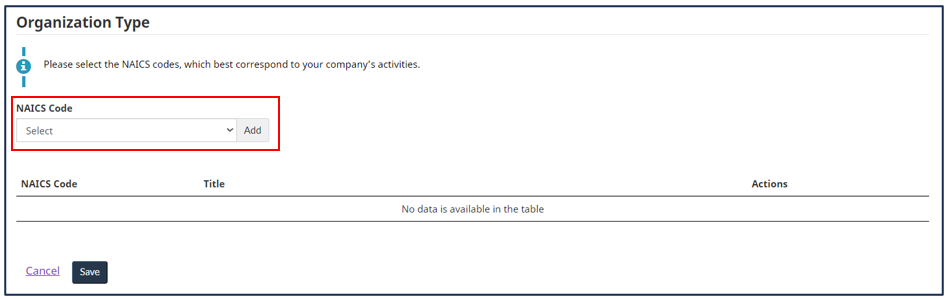
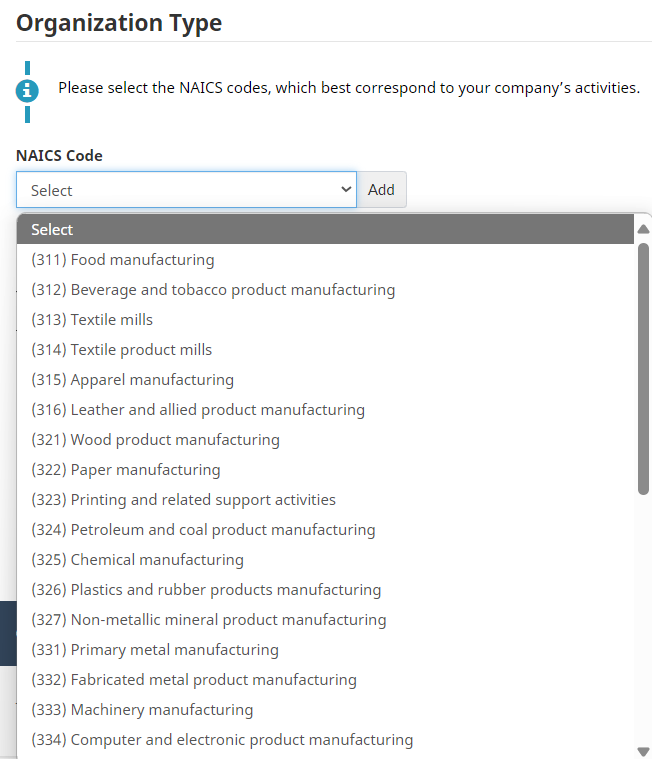
- Select the NAICS code from the dropdown list
- Select “Add”
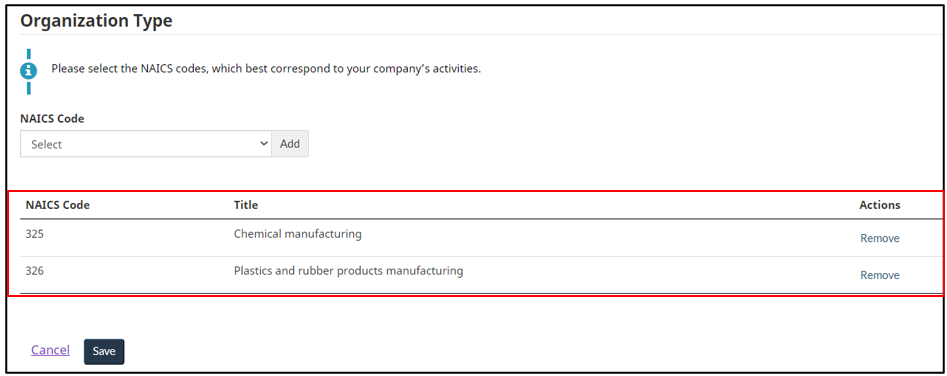
- The NAICS code and title are added to the table
- Select “Save”
- The Summary page is refreshed with the whole registration form.
4. The CRS registration form as a whole
Once a NAICS code is added, you see the complete registration form. The form is divided into 7 sections:
- Registration Information Card
- Organization Details
- Manage Emergency Contacts
- Sites
- Upload My Organization’s Safety Data Sheets (SDS)
- Manufacturers
- The attestation
Note: For ease of viewing, the whole form is broken down below into 7 screenshots. Depending on the NAICS selections you make in Organization Details section, sections E and F of the form will appear.
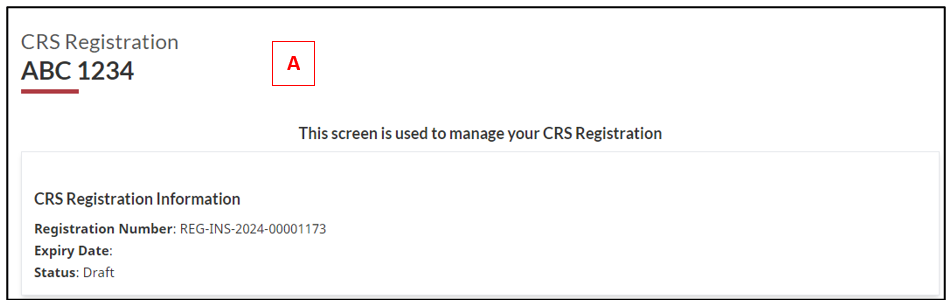


4.1 Registration Information Card section (A)
- This section contains basic registration information for the given CANUTEC registration such as:
- Registration Number
- Expiry Date
- Status of the registration

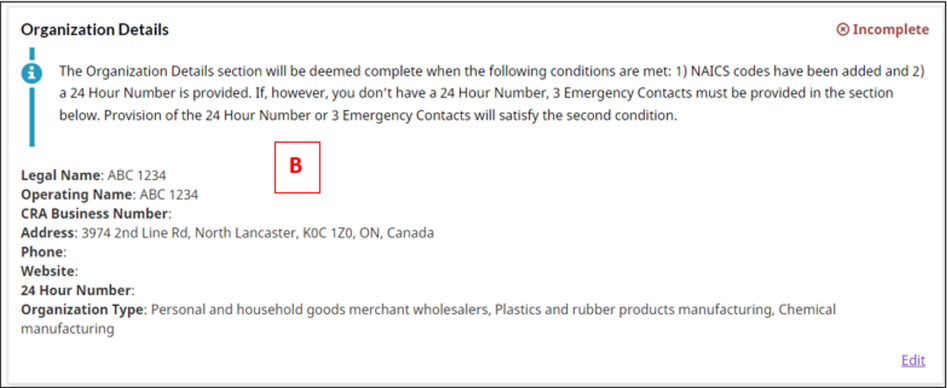
4.2 Organization Details section (B)
This section contains basic information about the organization. You first come across this section of the form at the beginning of the CRS registration process. Follow the steps in section 3.1 of this guide if you want to make changes to the Organization Details section.
Within this section, there are two important fields that impact other sections of the form:
- the 24-hour phone number and
- the NAICS code
Select “Edit” to add or modify these values. The information you put in either of these fields will impact which sections of the form you must complete. For instance:
- if you don’t include a 24-hour phone number, you will be required to add 3 emergency contacts in the Manage Emergency Contacts section
- if you select a NAICS code of 3xx, the section titled “Upload My Organization’s Safety Data Sheet” will appear on the registration form and you will have to complete it
- if you select a NAICS code of 4xx, 5xx, or 6xx, the section titled “Manufacturers” will appear on the registration form. You are required to complete the manufacturers section for all code 4xx series but is optional for NAICS codes of the 5xx and 6xx series
Once you’ve added a NAICS code and the 24-hour number, this section will be considered complete. Otherwise, if you don’t add the 24-hour number, this section will be made complete only once you’ve added 3 emergency contacts in the next section of the form.
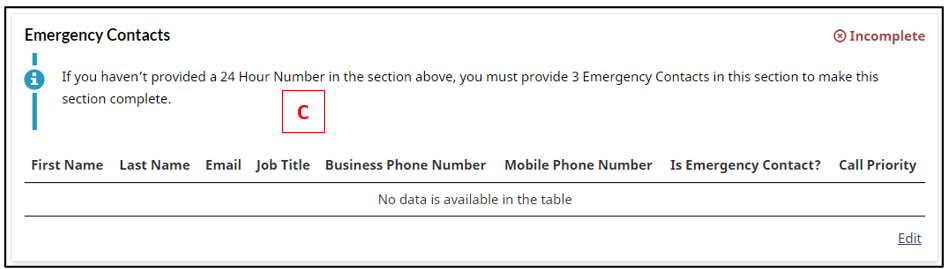
4.3 Manage Emergency Contacts section (C)
This section allows you to manage emergency contacts. If you haven’t provided a 24-hour phone number in the previous section, you must set up 3 emergency contacts. The section will be complete once:
- 3 emergency contacts have been added and call priorities have been assigned to them, or
- a 24-hour number was added in the Organization Details section
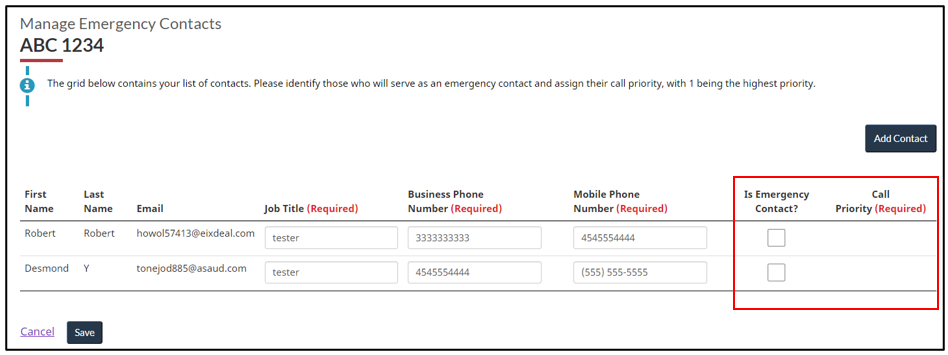
4.3.1 Add Emergency Contacts
- To add emergency contacts, select “Edit”

- A list of contacts is displayed
- To make a contact an emergency contact, click the “Is Emergency Contact?” checkbox
- The “Call Priority” checkbox is displayed as a result
- Select the call priority checkbox to assign the calling priority for this person
- 1 is the highest priority
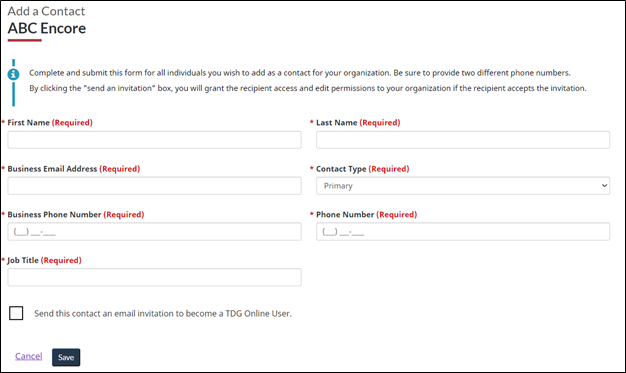
4.3.2 Add a Contact
If you don’t have enough contacts, you can add a contact here.
- Select the “Add Contact” button
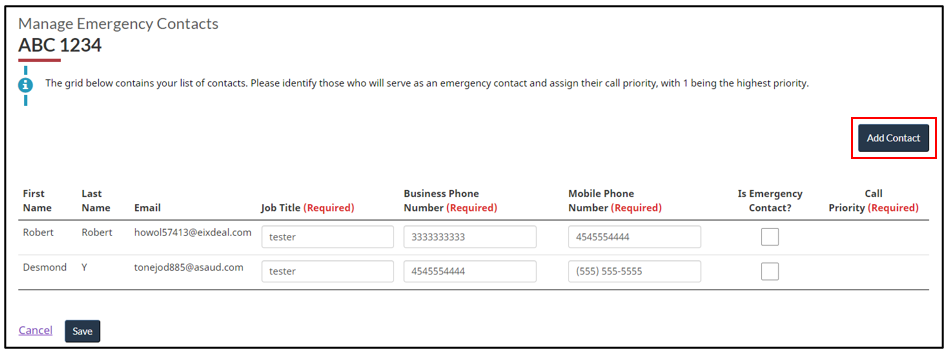
- Complete the “Add a Contact” form and save it
- The new contact will be added to the list of contacts
- Like for the previous contacts, you must indicate that this person is an emergency contact and set the call priority
- Select “Save”
- Once you’ve identified 3 emergency contacts and assigned calling priorities, the sections “Manage Emergency Contacts” and “Organization Details” will be complete
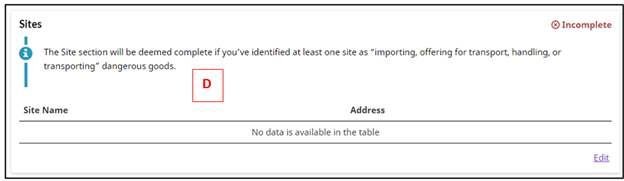
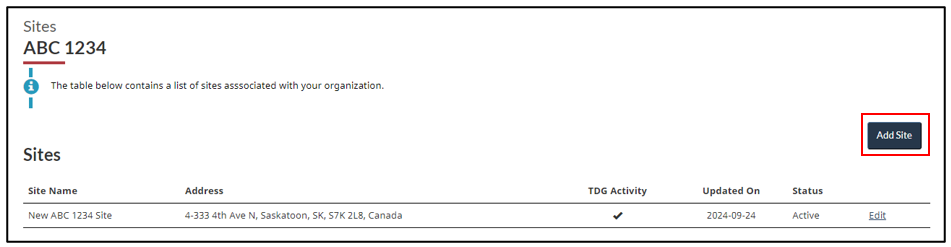
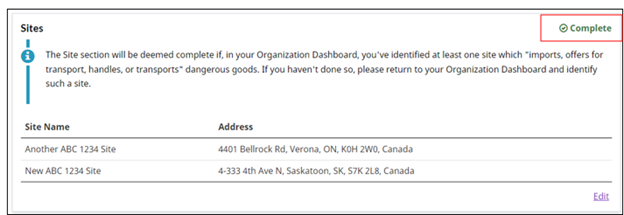
4.4 Sites section (D)
The Sites section lists sites that perform TDG activities. It is complete if there is at least one site identified as one that handles, offers to transport, transport, or imports dangerous goods.
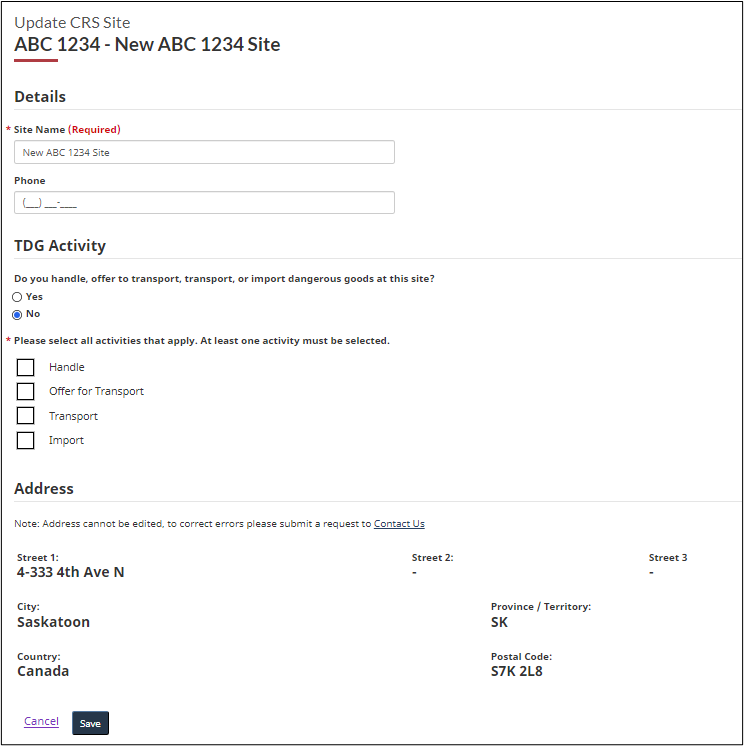
4.4.1 Edit site information
- Select “Edit”
-
You can change the site name and phone number. If you had previously specified that this site does not perform any TDG activity, you may change that information and save the form again. For any other correction, please submit a request.
Note that if you had previously specified that this site performed TDG activity, you will not be able to change the TDG activity.
- Select “Save”
4.4.2 Add a site
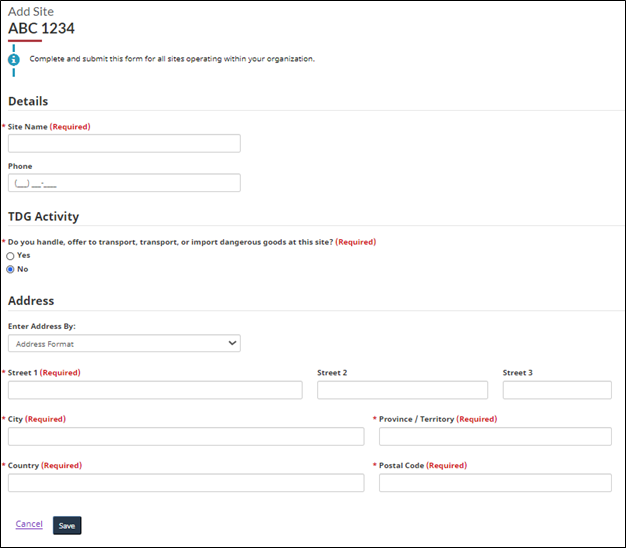
- Select the “Add Site” button
- Complete the “Add Site” form
- Enter the site name and phone number
- Answer the TDG Activity question: “Do you handle, offer to transport, transport, or import dangerous goods at this site?”
- Answering “Yes” to the TDG Activity question results in you being asked to specify which activities are undertaken at this site. Select the appropriate boxes.
- Complete the address information.
- Click “Save”.
Important Note: Once saved, you will not be able to change the TDG Activity later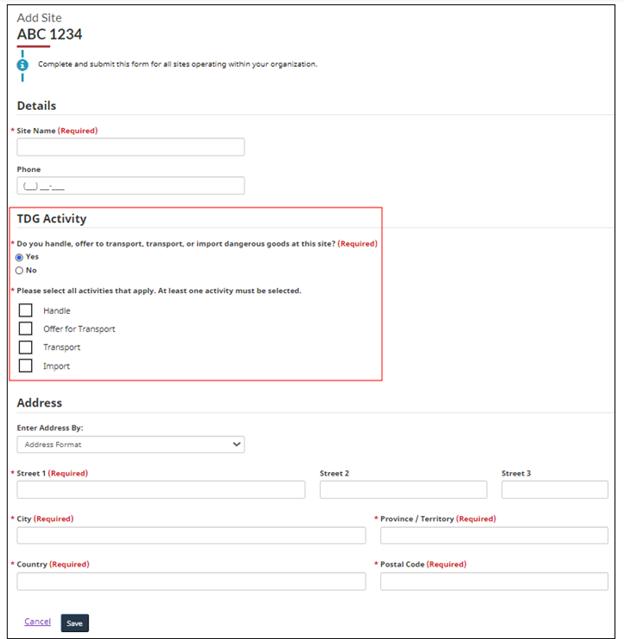
- Once you’ve completed these steps, the information in the table is updated.

- The Sites section of your CRS Registration form is complete.
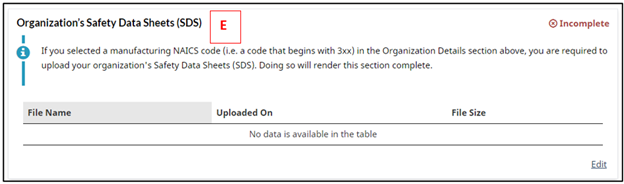
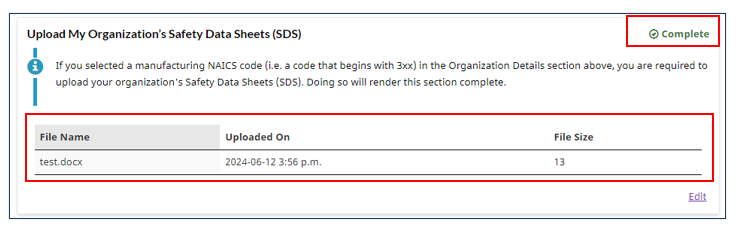
4.5 Upload My Organization’s Safety Data Sheets (SDS) (E)
This section of the form is displayed when you’ve selected a NAICS 3xx code in the Organization’s Details section of the registration form. Here you will upload the corresponding Safety Data Sheets. This section is considered complete when the appropriate SDS have been uploaded.
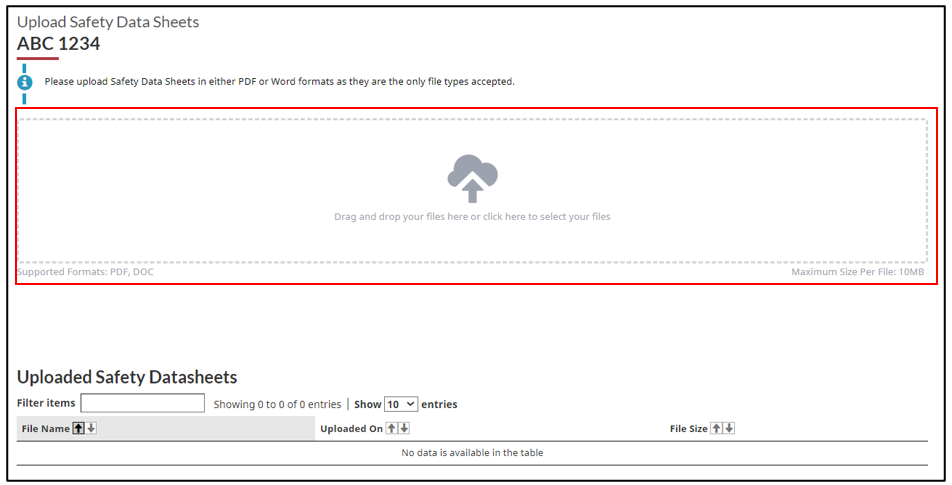
4.5.1 Upload SDS
- Select “Edit”
- The Upload Safety Data Sheets form is displayed
- To upload the SDS, you can:
- Drag and drop your files into the text box or
- Click in the text box and select the files to upload
- Only PDF and Word documents are allowed
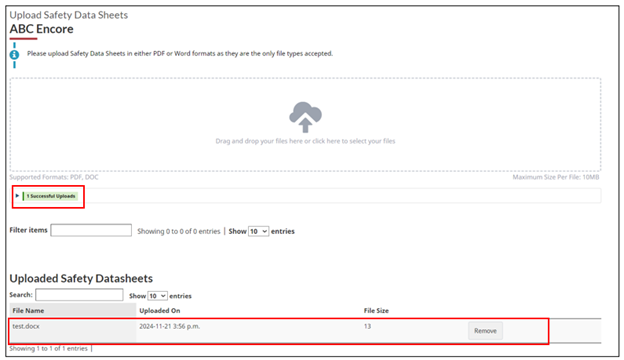
- An indicator lets you know how many files were successfully uploaded
- The uploaded files are displayed in the Uploaded Safety Datasheets table
- Note that you may remove the uploaded SDS from the table by selecting the “Remove” button.
- If we look back at the overall form, the files have been added to that table and the section is complete
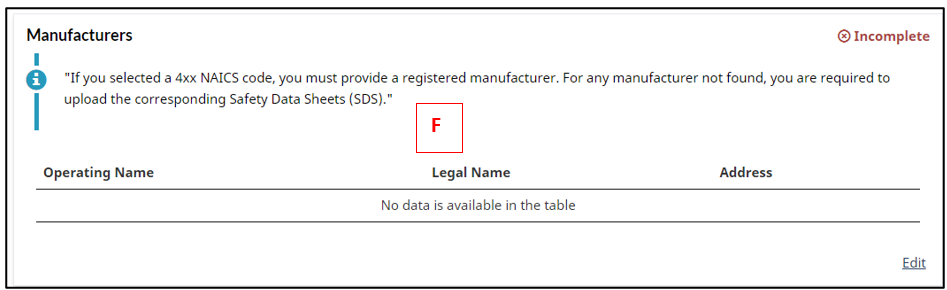
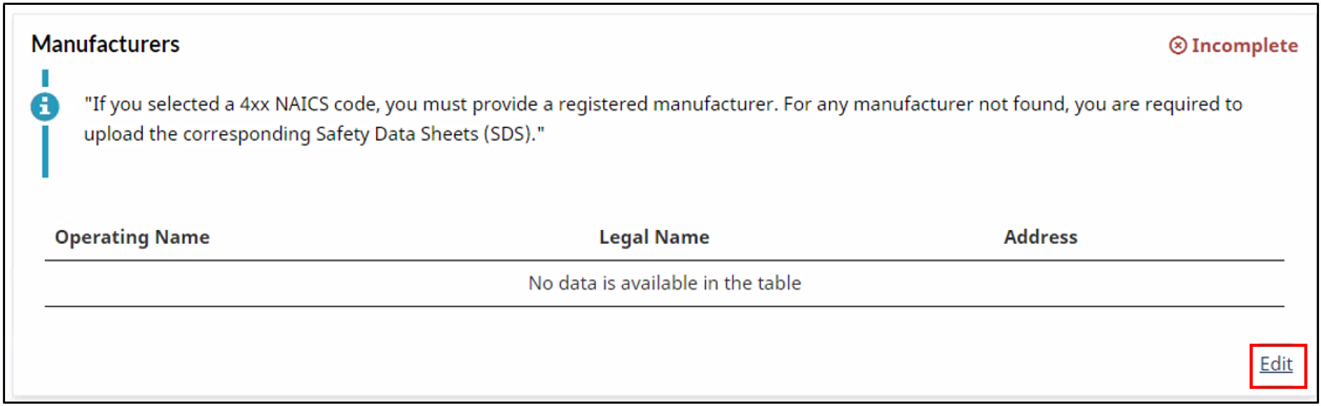
4.6 Manufacturers section (F)
This section is mandatory if you selected a NAICS code of the 4xx series in the Organization’s Details section of the CRS registration form.
4.6.1 Add a manufacturer
- Select “Edit”
- Search for a registered manufacturer
- Enter the manufacturers name or part of the name in the Registered Manufacturer’s search box and click “Search”
- In this example, different values are returned that include the word test, which is the word that was searched for
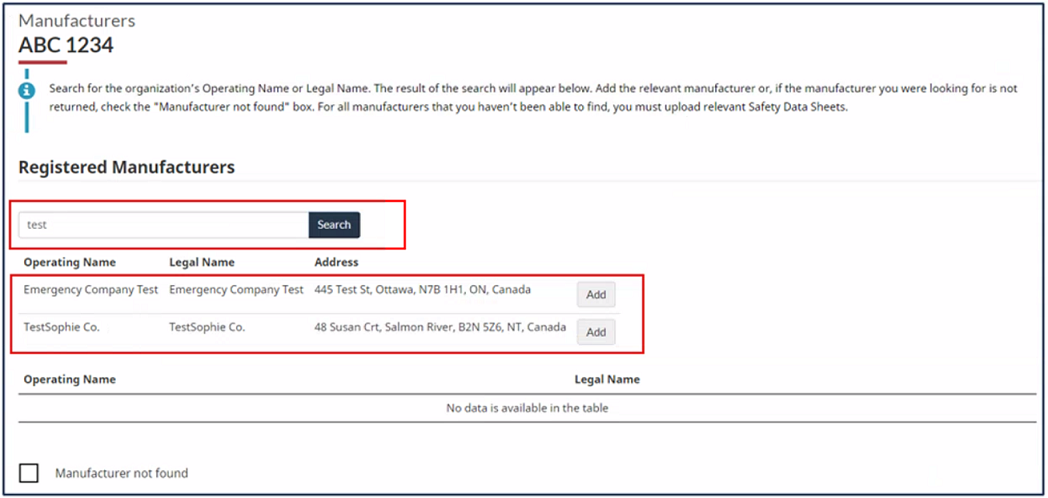
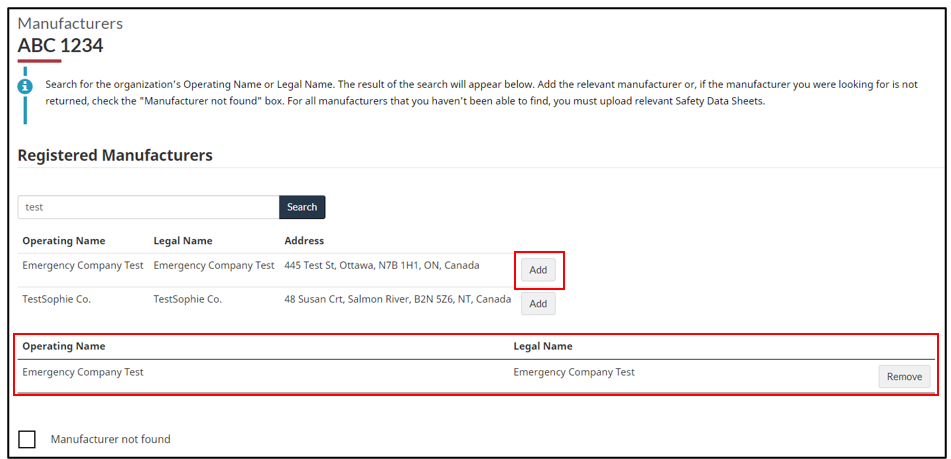
- Select the “Add” button to the right of the relevant manufacturer
- The manufacturer is added to the table below
- If you couldn’t find a registered manufacturer, click the “Manufacturer not found” checkbox
- The upload section for SDS and the Safety Data Sheets table appear
- Upload the relevant Safety Data Sheets
- The uploaded SDS will be added to the Safety Data Sheets table
- Select “Save” for the addition to take effect
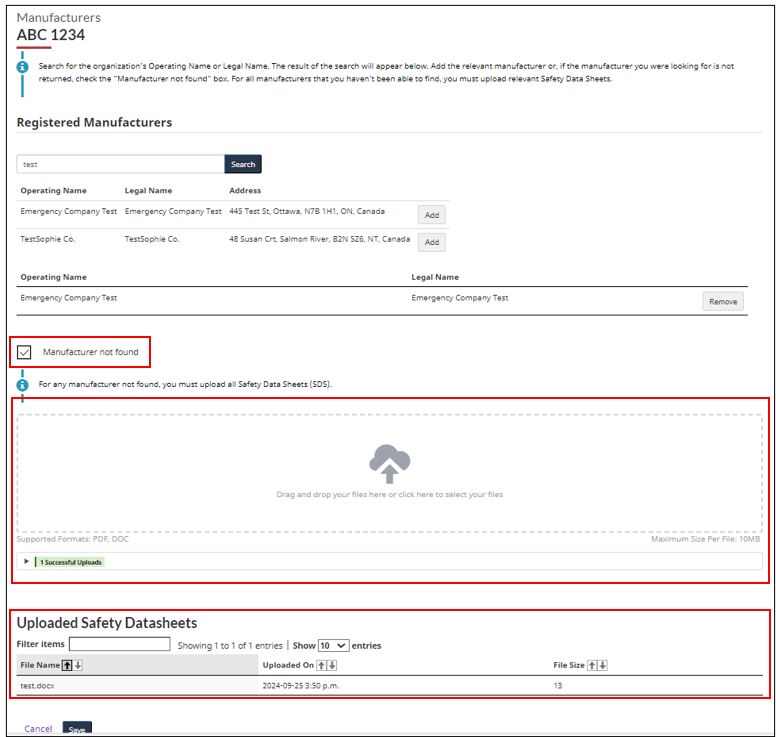
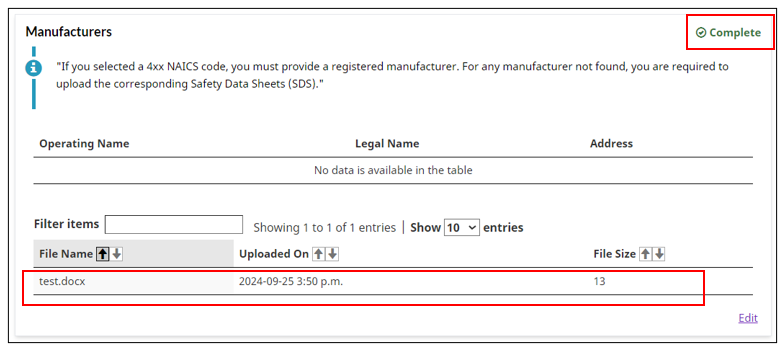
- After you’ve uploaded the SDS for the manufacturer that you couldn’t find, the Manufacturers section of the CRS registration form shows the uploaded SDS, test.docx in this case
- The section is complete
4.7 Attestation section (G)
The final section of the CRS registration form is the attestation.
- Select the check box to attest to the accuracy of the information provided
- Select “Submit”
